What to Expect During a Rolling Shutter Installation: A Step-by-Step Guide for Kelowna Homeowners
Deciding to install rolling shutters is the easy part. What catches most people off guard is not knowing what actually happens once they say yes, how long it takes, how disruptive it is, and what the finished result should feel like. After more than 22 years serving Kelowna and the Okanagan, Shutters and Shade has answered these questions more times than we can count. So here’s the honest, plain-language breakdown of the entire rolling shutter installation process from start to finish.
Before Installation Day: Quotes, Choices, and Custom Measurements
A great installation starts long before our team pulls into your driveway. The first step is a free, no-obligation quote where one of our experienced installers visits your property to assess your windows, doors, or commercial openings. This isn’t a quick look-and-leave, we take the time to understand what you’re actually trying to solve. Is it security? Heat control through a west-facing window? Privacy from the neighbours next door? The answer shapes every decision that follows.
During this visit, we take precise custom measurements of every opening. Width, height, depth, wall composition all of it matters. Rolling shutters are custom-built to fit, so an incorrect measurement creates headaches all the way down the line. We don’t rush this step.
We’ll also walk you through the choice between manual and motorised/electric operation. Manual shutters use a strap or crank and are a dependable, cost-effective option. Motorised models run off a wall switch or remote control and can even be connected to a smart home automation system so you can open and close your shutters from your phone without leaving the couch. We’ll help you figure out which option genuinely makes sense for your space and your budget.
Getting to Know the Key Components
Before installation day arrives, it helps to know what’s actually going into your home. Here’s a quick breakdown of the main parts of any rolling shutter system:
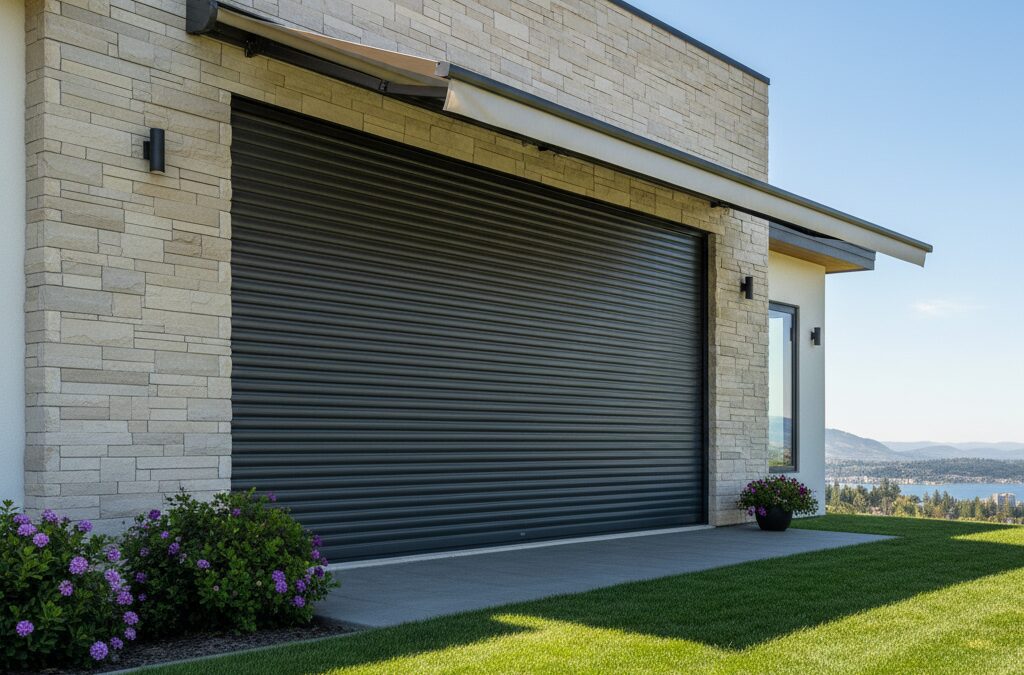
Roller box / headbox: The housing unit fixed above your window or door that conceals the shutter curtain when it’s fully open. Out of sight, out of mind.
Shutter curtain: The working part of the system, built from interlocking aluminium slats. Our shutters use powder-coated aluminium, which handles the full range of Okanagan weather without fading, cracking, or corroding.
Side guides / guide rails / guide channels: The vertical tracks fixed on either side of the opening that keep the shutter curtain aligned as it moves up and down.
Tubular motor: On motorised models, this sits inside the roller axle within the headbox and drives the whole system. It’s quiet, reliable, and sized to the curtain it’s moving.
Limit switches (upper and lower): These tell the motor exactly where to stop both when the shutter is fully open and when it’s fully closed. Precise settings here mean smooth, repeatable operation every time.
Installation Day: What Happens, Step by Step
This is what most people really want to know. Here’s exactly how a typical residential rolling shutter installation unfolds from the moment our team arrives.
Step 1: Site Preparation and Access Check
Our team arrives with your shutters already custom-built and ready to go. The first thing we do is walk the job with you, confirm access to all windows and openings, and cross-check our measurements against the actual openings on site. We ask that the immediate area be reasonably clear, furniture pulled back from windows, existing blinds or curtains temporarily removed, and for motorised installs, access available to the electrical panel. The more open the workspace, the faster and cleaner the job gets done. Most clients are genuinely surprised by how little disruption there actually is once we get going.
Step 2: Mounting the Roller Box
With the site prepped, we mount the roller box (headbox) above each opening. This needs to sit perfectly level even a small tilt here affects how the curtain tracks and seals at the bottom. We mark fixing points carefully, drill into the wall or fascia, and secure the headbox with fixings appropriate for your wall type, whether that’s stucco, brick, timber framing, or anything else.
Step 3: Installing the Side Guide Rails
Next come the guide channels. These run vertically on both sides of the opening and keep the shutter curtain tracking straight through every open and close cycle. We fix them perfectly plumb and flush against the wall. This step matters more than it might seem; guide rails that aren’t sitting correctly will eventually cause the curtain to bind or pull away from the wall, which is the kind of problem you really don’t want down the track.
Step 4: Fitting the Shutter Curtain
Now it starts to look like something. The shutter curtain made up of interlocking aluminium slats is carefully fed down from the headbox into the guide channels. When the custom measurements are right, the slats sit cleanly in the guides with no forcing or adjusting required. This is also when you get your first real sense of what your new shutters actually look like, and clients consistently tell us it’s the moment they feel confident they made the right call.
Step 5: Connecting the Tubular Motor and Controls
For motorised models, the tubular motor is fitted inside the roller axle and wired to your chosen control point a wall switch, a remote control receiver, or a smart home hub. There may be a brief power outage to the circuit we’re working on during the wiring stage, usually no more than 20 to 30 minutes, and we always give advance notice before we turn anything off. Once connected, we test motor direction and torque before moving on.
Step 6: Setting the Limit Switches and Testing
The final installation step is programming the upper and lower limit switches. These settings control exactly how far the curtain travels in each direction where it stops when fully open and where it seals when fully closed. We run the shutter through multiple full cycles, watch it carefully for any hesitation or tracking issues, and make fine adjustments until smooth operation is confirmed. We don’t call a job done until we’d be happy to live with it ourselves.
How Long Does a Rolling Shutter Installation Take?
For a single window or door with a manual shutter, expect one to two hours. A motorised single opening takes a little longer, usually two to three hours due to the electrical work involved. A full residential installation covering multiple openings typically takes one full day. Larger commercial rolling shutter projects are scoped individually at the quote stage, and we’ll give you a clear installation timeline upfront so you can plan around it.
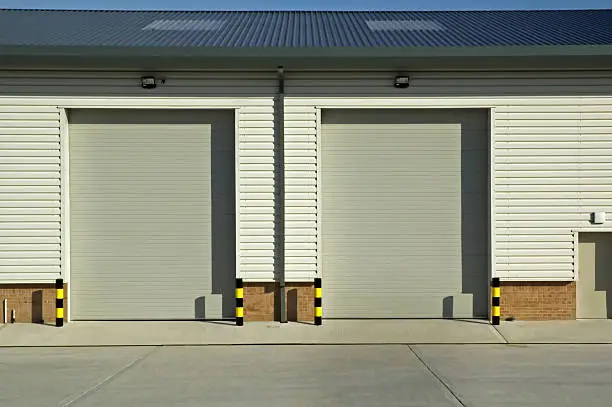
For business owners, we understand that property disruption needs to stay minimal. We regularly work around trading hours early starts, after-hours installs, or staged work across a couple of days whatever keeps your operation running smoothly throughout.
What Happens After the Installation
Post-Installation Walkthrough and Demonstration
Before we pack up, we always do a full post-installation walkthrough with you. We demonstrate how each shutter operates, walk you through the remote control or wall switch, and show you the manual override procedure for motorised models in the event of a power outage. If something doesn’t feel right or you have questions, this is the time to raise them. We’d rather spend an extra ten minutes with you at the end than have you puzzling over something later that evening.
Warranty Coverage
Your rolling shutters come with warranty coverage on both the product and our installation workmanship. We work with Talius Rollshutters, a premium Canadian-made product with a solid manufacturer’s warranty and our own professional installation is fully backed. If anything isn’t performing as it should within the warranty period, call us and we’ll take care of it.
Maintenance Tips to Keep Things Running Smoothly
Rolling shutters are genuinely low-maintenance, but a little regular attention keeps them performing quietly and reliably for years.
- Apply silicone spray lubricant to the guide rails and guide channels every six to twelve months. Using silicone only oil-based products attract dust and gum up the mechanism over time.
- Wipe down the powder-coated aluminium slats periodically with a damp cloth to clear dust, pollen, and any debris that builds up especially after Okanagan windstorms.
- Check the guide channels at the start and end of each season for leaves, small stones, or debris that could cause the curtain to bind.
- If you notice any unusual noise, hesitation, or resistance during operation, call us before a small issue becomes a bigger one. Catching things early almost always means a faster, cheaper fix.
Why Rolling Shutters Are Worth It
Security and break-in deterrence: A locked window is one layer of protection. A solid barrier of interlocking powder-coated aluminium is another thing entirely. Rolling shutters are one of the most effective physical deterrents available for residential and commercial property protection, and studies consistently back this up.
Energy efficiency and insulation: The air gap created between the shutter and your window significantly improves insulation. Expect real reductions in heating and cooling costs, especially through the intense heat of an Okanagan summer. The Canadian government recognised this benefit and offered tax incentives on rollshutters as far back as 2009.
Noise reduction: If you live near a busy road, a commercial strip, or just have particularly loud neighbours, the added mass of a rolling shutter delivers meaningful noise reduction that a standard window simply can’t match.
Weather resistance and UV protection: Powder-coated aluminium handles everything the BC Interior throws at it. Your shutters provide genuine weather protection and block harmful UV rays that would otherwise fade your flooring, furniture, and window treatments over time.
Bottom line
The rolling shutter installation process is far simpler and less disruptive than most people expect especially when you have an experienced team handling it. From accurate custom measurements through to the post-installation walkthrough, Shutters and Shade makes the whole experience straightforward. If you’ve been sitting on the decision, there’s no better time to move on it. Call us at 250-305-9660 or request your free quote online. We’d love to show you what a difference the right shutters make.